I let my new white pine boards sit in the shop in the basement for six weeks to let them acclimate. White pine is not supposed to move so much with changes in humidity, but it is still best to make sure the boards are stable while working with them. I take a long time working on my projects, so many days can pass between flattening a board and cutting joints in it.
Flattening boards
I made each case side from two 12” boards glued together to get a 24” wide panel. I cut the pieces to length, making sure there were no knots near the cut. It would be difficult to make dovetails in a knot. The boards are not completely flat because the wood moved after it was milled, so I planed each piece flat on both sides, and made sure all the pieces ended up with the same thickness.
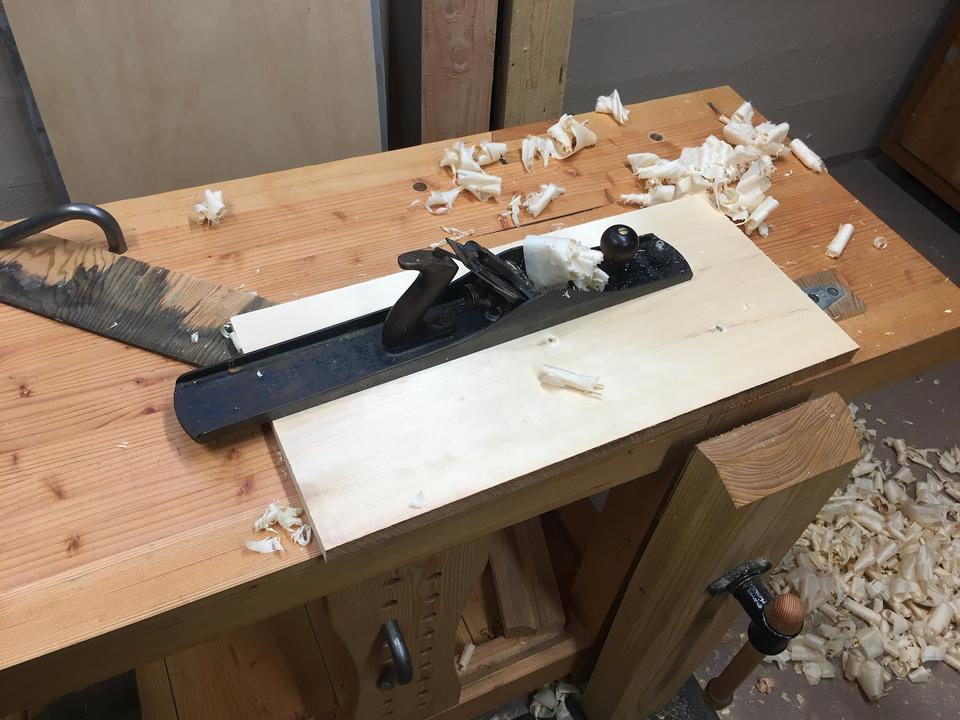
I also made sure the edges were straight and exactly 90° to the faces. This is extra important for the edges that are glued together so there are no gaps.
Gluing up the panels
I needed all my clamps to glue a single panel, so I had to do the four sides separately over four days.
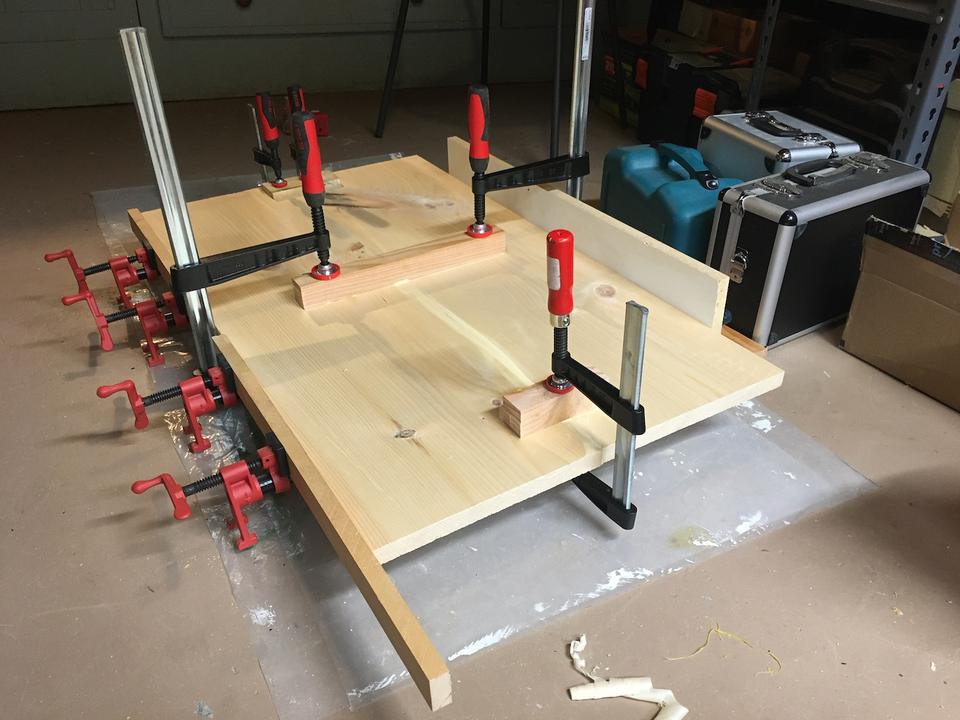
I used four pipe clamps to apply pressure on the edge joint and F-clamps to secure cauls in order to make the panel as straight as possible. Transparent packing tape on the cauls makes sure that the glue doesn’t stick to them.
One of the edges wasn’t perfectly square, so the panel came out with a small angle in the joint. It’s so small that I can push it out when joining the dovetails.
Flattening the panels
After the glue dried, I flattened the whole panel again to get rid of the imperfections in the glue joint. The panels are wider than my workbench, so it was a bit tricky to hold them securely.
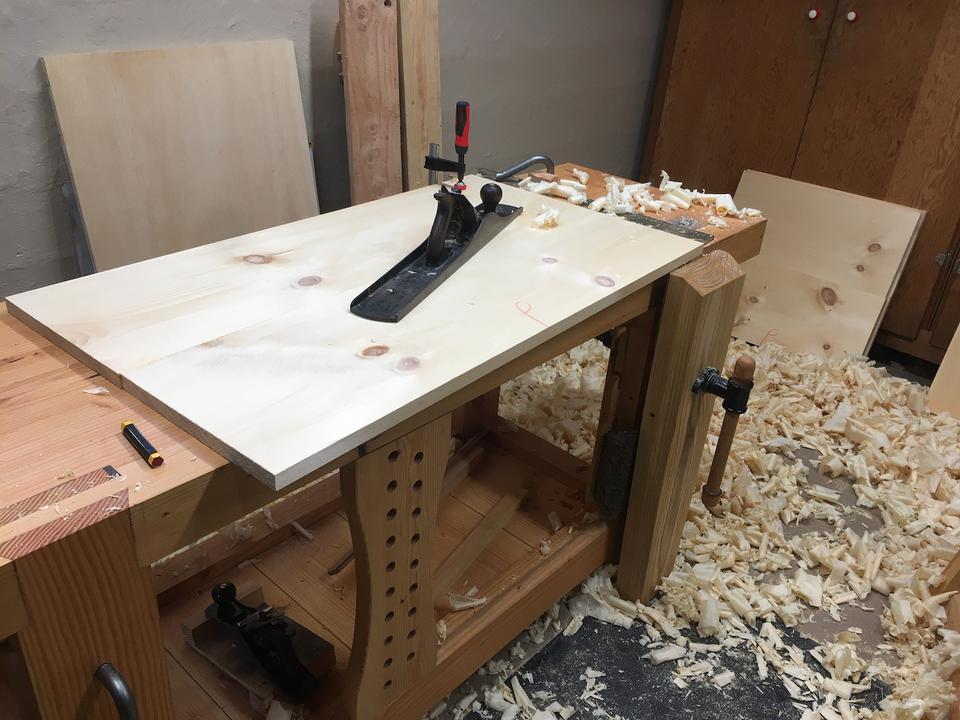
One of the panels had a bump because the two boards were not exactly the same thickness when I glued them. Next time I should be more careful to get the boards to the same thickness before gluing them up. I think that will make the cauls work better too.
I also planed the edges of the panels to get them perfectly parallel and to get all the panels to the exact same width.
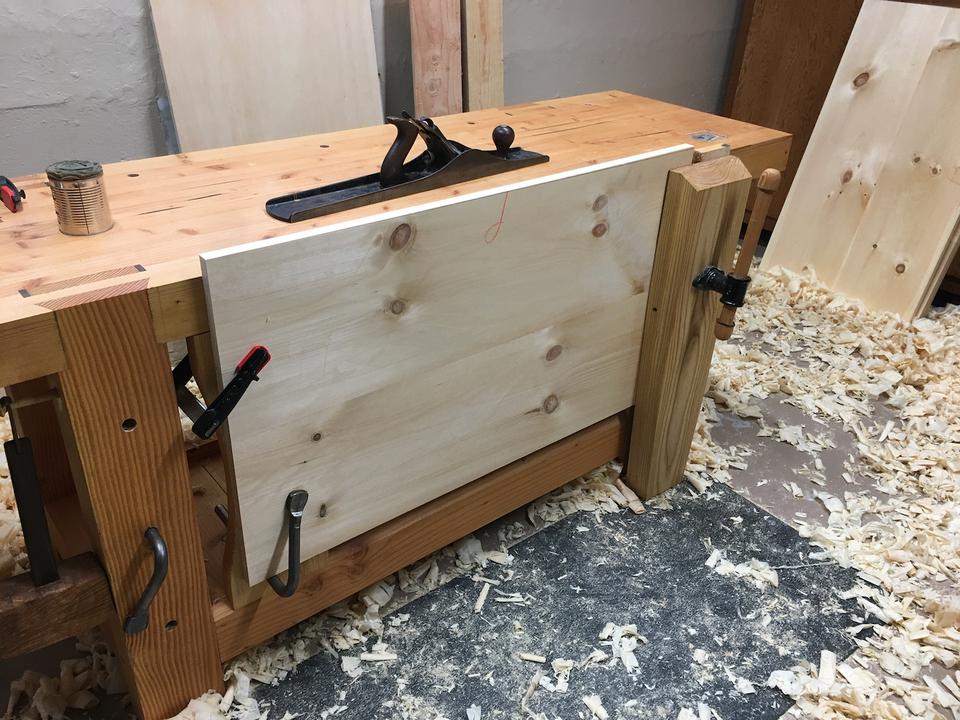
The corners of the chest are going to be dovetailed together, so it is important that the ends of the panels are perfectly square. This is hard to do with a saw alone, so I built an improvised shooting board to help with planing the ends square.

I worked from both sides towards the middle of the panel. I didn’t want to risk splitting the wood near the edge by planing the whole width. A proper shooting board would have a fence to prevent the wood from splitting, but this method worked okay with such a wide panel.
The sides are now ready for dovetailing.